
Embrace the glitchness
I decided to write this up because, as a novice in code and programing I had to search a number of sites to find enough snippets of information to piece together what I had to do to get a glitch.
First off to glitch using audacity you need audacity, so :
http://audacity.sourceforge.net/ down load the latest here.
http://www.techspot.com/downloads/3689-adobe-photoshop-cs2.html and if you fancy CS2 _ Adobe Photoshop 2 then you can down load it here fro free.
You might also need the Gimp as Photoshop struggles to open the glitch work until you save it as a different file type. Get it here free
Right on to the good stuff.
Step 1, find an image a decent resoloution will help. Open it in Photoshop, The gimp or what ever digital software you prefer, and save the image as an uncompressed file. BMP or TIF. I use TIF.
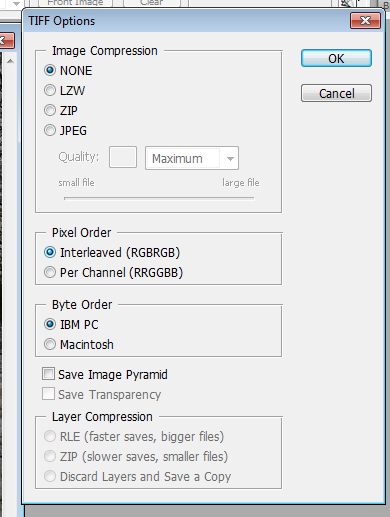
Keep it as Interleaved ( It keeps the colour channels mixed. More on that later.)
Save the image.
Step 1 - Open Audacity.
Click , File / Import / Import Raw Data.

and navigate to the folder holding the image. You'll get the following dialogue box.

Set the encoding to U-Law, and the Byte order to 'Big-endia'. Leave the rest of the details. Click Import. You should see a sound file like the one below.
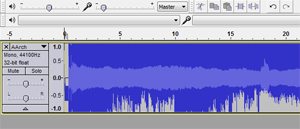
If you look closely or zoom in to the first section you can see where the file 'header' ends Skip that section. If you mess with it then you can't open the file at all. (As far as I can tell. I read that the same is true with the end of the file but I haven't found that o be the case.)
If you are unsure where the header ends then skip about 5 seconds at the start of the file.
Step 2 - Get your glitch on.
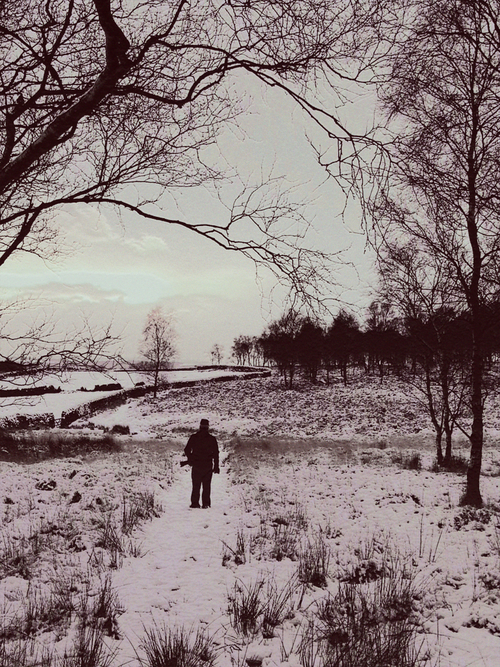
This is the image I chose for this demo.
Now try this to start. Remember to skip the 'header' of the file and select about 10 seconds of the file. Press Ctrl+x. Move to another section of the sound file and press Ctrl+v. You should get an image like this.

Step 3- Exporting the image.
Click File/ Export

The following should appear.

Click on 'save as type' and select 'Other uncompressed files'
Set the Filename to 'yourfilename.TIF ' the tif is important the file will not open unless you set the export file type to the same as the imported file type.
Click on 'Options'
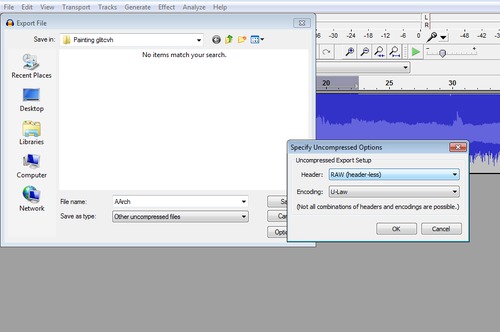
Set the header to 'Raw(header less)'. Then set the 'encoding' to U-law'. Click 'Ok'
The following warning will pop up. Click 'Yes'.

If you try to open the file with Photoshop it may not recognise or be able to open the file so try Paint or The GIMP first and save it as a JPEG. It should then open in Photoshop where you can create a glitchy Gif. There are many tutorials for those online.
Remember though you are destroying the actual bits of information. So the image can break. This means push the image too far and you won't see anything because the image code has been rendered unreadable. You'll have to find the limits on your own.
To get a feel for what you can do it's best to highlight a section and apply one filter to the image at a time. Export it and see if anything happened. If not ramp up the variables. Then apply another filter to the same section. I find it helps to save the filter name and variable in the file name.
In part 2....
I'll run through some examples of effects from the filters applied in audacity. You can also download other filters as plugins or create your own.